

We have received all the best software online at a relatively cheap price. The way WordPress makes web design easy for web developers, in the same way, Adobe Lightroom makes image editing easier for photographers.
Professional photographers edit photographs in Adobe Lightroom before transferring them to the website. Although photo editing is a must, manually transferring them into a WordPress website can be a bit time-consuming.
In this article, we are sharing with you some simple ways to quickly transfer photographs from Adobe Lightroom into your website with a single click.
You must install Adobe Lightroom on your laptop. Creative Suite or Lightroom 5 (or later version) will work fine. Then, you should use Envira Gallery, the best gallery plugin. It permits you to make stunning responsive picture galleries on your website.
Tip: If you want Google to rank your images, you must rename your images with the name that defines them. File names like "lightroom-image-upload.jpg" are way better than "IMG_2345.cr2." Using a file name with simple SEO-friendly words that define it will increase its possibility of being found.

Adobe Lightroom and WordPress do not integrate. You need to make some changes. Here are the steps to integrate Adobe Lightroom into WordPress Website:
Setting Up Adobe Lightroom
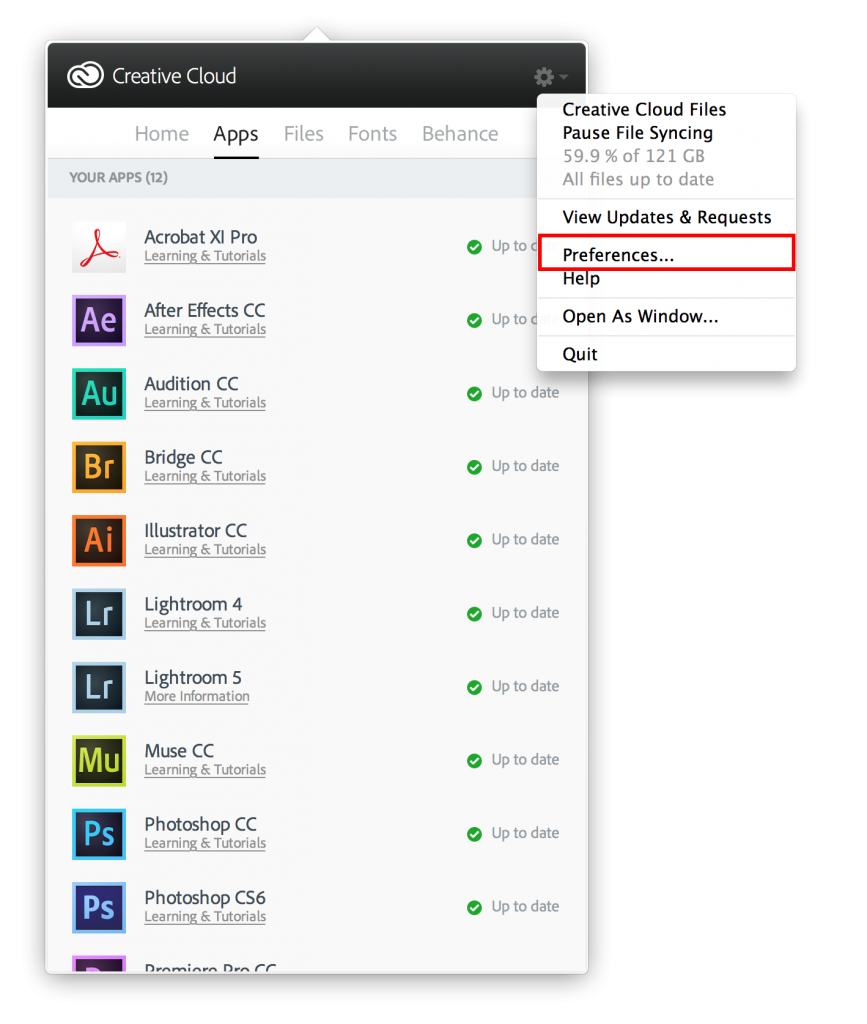
You must install and set up the Adobe Creative Cloud application on your laptop. After installation, you have to log in with your Adobe ID. Once signed in, ensure that file syncing is not disabled. Enable file syncing.
Note: There are many WordPress plugins, or add-ons to sync these platforms for free. But, most plugins aren't regularly updated and can open your website security issues. You should also check with the developer managing the plugin compatible with the latest versions of WordPress.
Wouldn’t it be great if you could sync these two useful platforms?
In this article, we are sharing with you some simple ways to quickly transfer photographs from Adobe Lightroom into your website with a single click.
Requirements
You must install Adobe Lightroom on your laptop. Creative Suite or Lightroom 5 (or later version) will work fine. Then, you should use Envira Gallery, the best gallery plugin. It permits you to make stunning responsive picture galleries on your website.
Tip: If you want Google to rank your images, you must rename your images with the name that defines them. File names like "lightroom-image-upload.jpg" are way better than "IMG_2345.cr2." Using a file name with simple SEO-friendly words that define it will increase its possibility of being found.
How to upload your images from Lightroom to WordPress?
Adobe Lightroom and WordPress do not integrate. You need to make some changes. Here are the steps to integrate Adobe Lightroom into WordPress Website:
Setting Up Adobe Lightroom
You must install and set up the Adobe Creative Cloud application on your laptop. After installation, you have to log in with your Adobe ID. Once signed in, ensure that file syncing is not disabled. Enable file syncing.
Note: There are many WordPress plugins, or add-ons to sync these platforms for free. But, most plugins aren't regularly updated and can open your website security issues. You should also check with the developer managing the plugin compatible with the latest versions of WordPress.
The Envira Gallery plugin is the recommended popular plugin (premium). WP/LR Sync and LR/Blog are the other two famous plugins (free). However, if you use the free plugin, you might be required to download other premium plugins from the Meow Apps website.

Using the Envira Gallery plugin
Install Envira Gallery add-on for Lightroom. To use it, you need Envira Gold or a higher license.
Go to Add-ons for the Adobe Lightroom page. Then, search for Envira Gallery.
Click on Envira Gallery. Then, click on the Install/Free button, on the next page which just opened, to continue. Envira Gallery add-on should now start installing. Once installed, check the Creative Cloud application of the message of successful installation of the Envira Gallery add-on.
Envira-gallery.zip and enviralrplugin.zip files will also be downloaded to your laptop. Visit the laptop's Downloads folder to find and extract both the files. Unzip the file by doubling clicking on it. It will also include a file named envira.lrplugin.
Open Adobe Lightroom. Then, in the toolbar, click on File » Plugin Manager.
The plugin manager menu window will be raised. Click on Add button. Then, choose envira.lrplugin file from your laptop. Hit the Done button to see Envira Gallery in Adobe Lightroom.
Envira Gallery has been correctly included as a publish service to Lightroom. You must set up Envira Gallery for Lightroom.

Setting up Envira Gallery plugin
Click on install. Then, click on activate Envira Gallery plugin. After successful activation, one should head to Envira Gallery and then to its Settings page. You have to verify your license key. On the Envira Gallery site, you can get your license key from your account page.
After successful verification, click on the Add-ons tab. Then, click on the Install Add-on button. To find Lightroom Add-on, you need to search below.
Install the Lightroom add-on, and then enable it by hitting on activate button.
Reload the settings page to head to a new tab named Lightroom. Click on the Lightroom tab to see two choices.
Select the user account for publishing pictures from Lightroom. Generate and copy an access token which will be needed in the next step.
Save the settings.

Connect Lightroom to Envira Gallery Plugin
After setting up Envira Gallery and Lightroom, permit Lightroom to communicate with Envira Gallery.
Head to Adobe Lightroom and under publishing, service panel hit on the ‘Setup’ link.
Upon correctly setting up the Envira Gallery plugin, you will be directed to the publishing services manager tab.
Give your WordPress website's address and your access token which you previously generated. Then, choose Use WP Rest API v2 to connect Lightroom with your WordPress website.
Hit authenticating button. Lightroom will get linked to your website. When it gets connected successfully to your website, you will receive a message of successful authentication.
Click OK and Save the settings in the publishing services manager window.

Upload Images From Lightroom into WordPress
The stated steps should have guided you in successfully setting up the Lightroom add-on and Envira Gallery plugin. In the future, you may have to repeat those steps.
With Envira Gallery, you can quickly transfer all your images from Lightroom to the website.
Make new collection
Head to Adobe Lightroom and right-click on Envira. On the menu, hit on ‘Create Published Collection.’
Collection name
You will see a pop-up window. Give a name for your collection or image gallery on your WordPress website.
Click on 'create' to continue. You can drag and drop pictures from the library to the new empty collection.

Publishing from Lightroom to Envira Gallery
When you add, remove, or edit pictures in a collection, you have the option to Publish them. Click on publish button to transfer your images to the WordPress website.
Save them in the Envira Gallery. You can make changes to your image as per your wish. Edit your pictures in Lightroom, add or remove pictures. Click on the publish button.
In the WordPress dashboard, visit Envira Gallery to check the Lightroom collection in the gallery.
The new gallery is created and saved as a draft. Publish it to add it to your posts or pages.

Using WP/LR Sync Plugin
On your WordPress plugin panel, search for WP/LR Sync. Then, install and activate it. Once the plugin is successfully installed, visit its admin panel. You should enable the Post Types extension. Save the changes.
Now, to make any changes in your extensions, visit WP/LR Sync > Post Types tab.
To make any further changes, visit WP/LR Sync > Settings.

That’s all. You have correctly connected Lightroom with your WordPress website! Congratulations. Now, you can quickly transfer your pictures directly from Adobe Lightroom to your website's image galleries.


0 Comments